Email Scheduler
Email Scheduler is an extension for Dynamics 365 Business Central developed by BCILITY, designed to automate the sending of documents via email at predefined intervals. Instead of manually sending invoices, delivery notes, quotes, or other reports, users can configure a schedule that allows documents to be automatically generated and sent directly from the system. This extension significantly improves communication efficiency with clients and partners, reduces manual workload, and ensures timely delivery of important business documents. It’s an ideal solution for companies looking to automate the sending of invoices, reminders, or confirmations according to their business rules.
1. Email Scheduler Setup
1.1 Activation
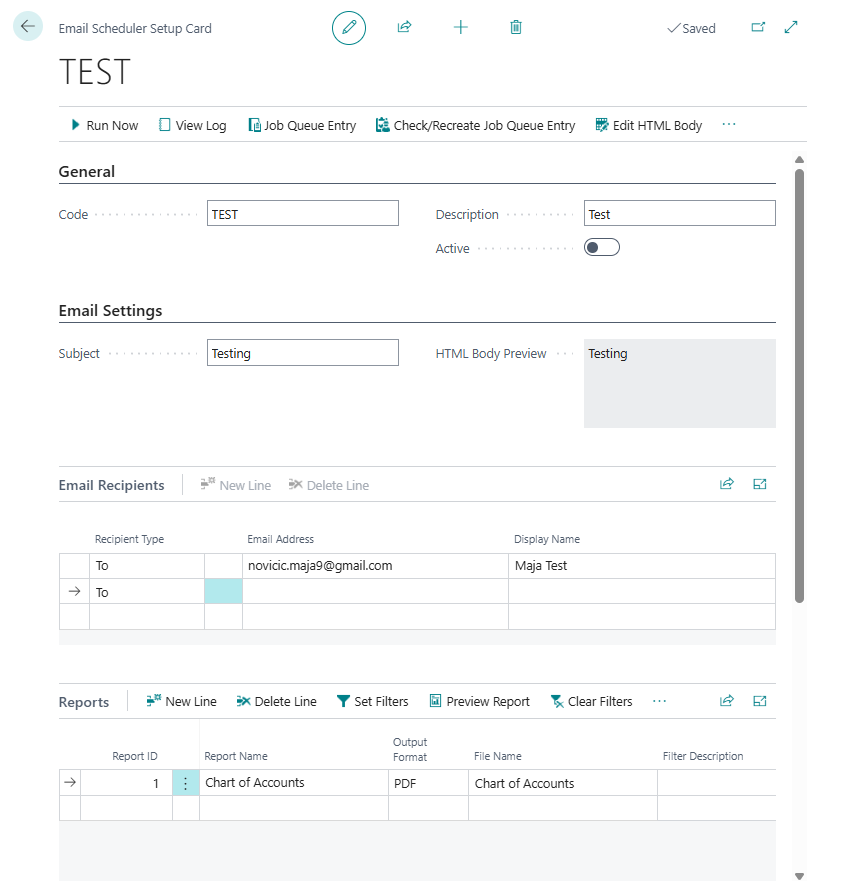
To begin, open the Email Scheduler Setup page and click New to create a new scheduler. A new scheduler card will open, where you must enter a scheduler Code in the General section. The description field is optional.
In the Email Settings section, define the subject of the email and enter the content in the HTML Body Preview field. Then, specify the email recipients by selecting the Recipient type (To, CC, or BCC), entering the email address, and optionally adding a display name that will appear in the email header.
The Reports section allows you to select one or more Business Central reports to be attached to the email. When selecting the Report ID, the report name is automatically filled in. You can then define the output format – PDF, Word, or Excel – and optionally enter a custom file name for the attachment. A field is also available for describing the applied filters.
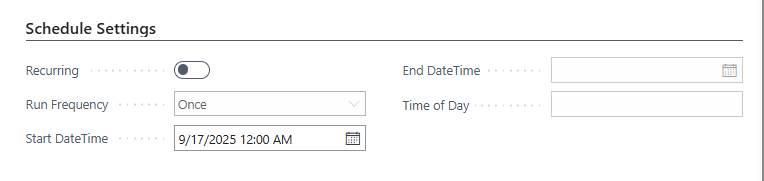
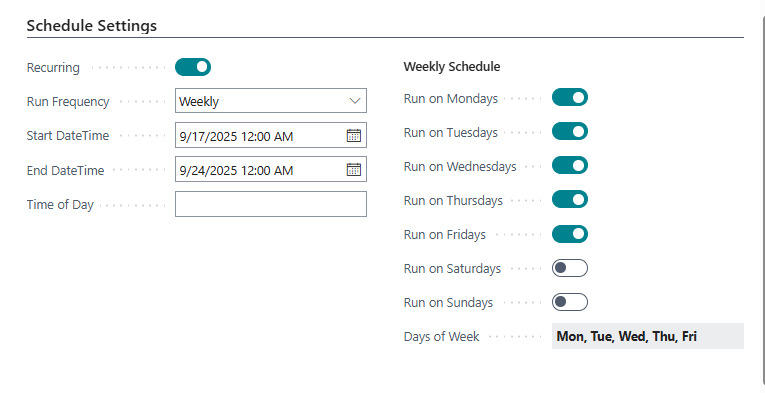
Next is the Schedule Settings section, where you define whether the email will be sent once or on a recurring basis. If recurring sending is needed, enable the Recurring option; for one-time sending, leave it disabled. For one-time sending, simply define the date and time. For recurring sending, you can choose between daily, weekly, or monthly intervals, and set the start and end dates, as well as the exact time of day. In the case of a weekly schedule, you can further specify which days of the week the email should be sent.
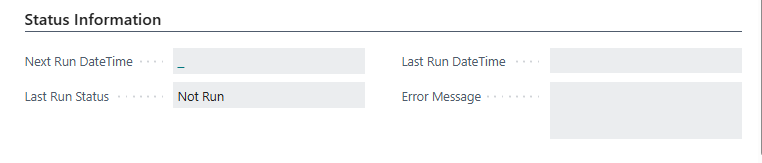
Finally, the Status Information section displays the date and time of the next scheduled email, details of the last execution, its status, and any error messages if issues occurred during the process.
Once all required fields are configured, activate the email scheduler by checking the Active field in the General section. This enables the scheduler to start sending emails automatically according to the defined schedule and parameters.
1.2 Toolbar Actions
At the top of the email scheduler card, several actions are available, described below:

-
Run Now - This option allows manual execution of the scheduled email, regardless of the defined schedule. It’s useful for testing or sending the email immediately without waiting for automatic execution.
-
View Log - Opens the execution log page, where you can review all previous email sending attempts. This feature is useful for tracking successful and failed executions and analyzing potential errors.

- Job Queue Entry - Displays the related Job Queue Entry responsible for automatic execution of the scheduler. From here, you can monitor or modify technical details related to the execution schedule.
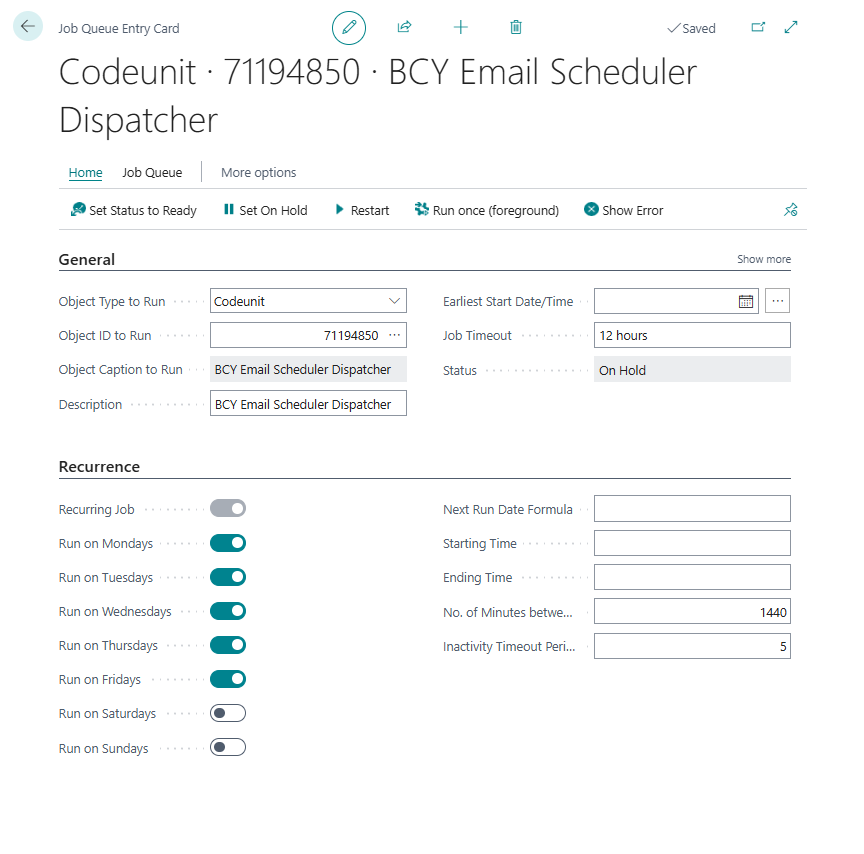
- Check/Create Job Queue Entry - Automatically checks whether a valid Job Queue Entry exists for this email scheduler. If none is found, the system will create a new one, ensuring that emails are sent according to the defined schedule.
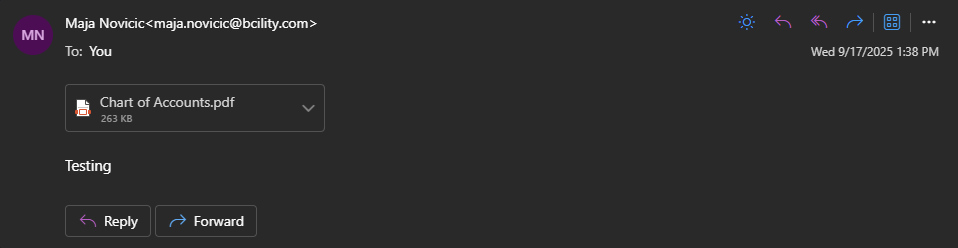
1.3 Received Email Example
Example of an automatically sent email: